Saturday, July 20, 2019

Oracle Linux 7 (OL7) Installation Step by Step


  • Basic Installation

  • Network Configuration

  • Customising Software

  • SELinux

  • Firewall

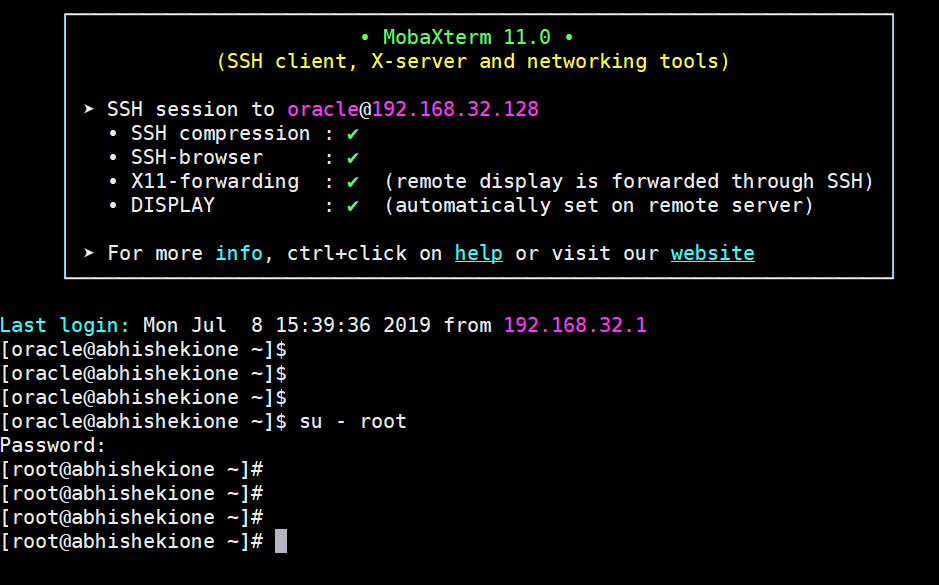
  • SSH


Basic Installation

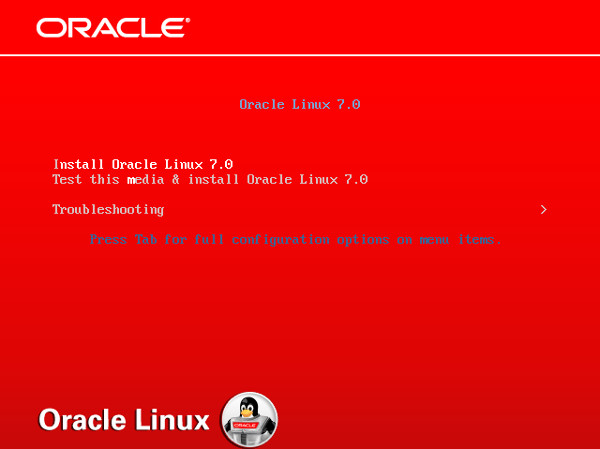
  1. Boot from the DVD. Use the up arrow to pick the "Install Oracle Linux 7.0" option and hit the return key.
    Boot

  2. Select the appropriate language and select the "Set keyboard to default layout for selected language" option, then click the "Continue" button.
    Language

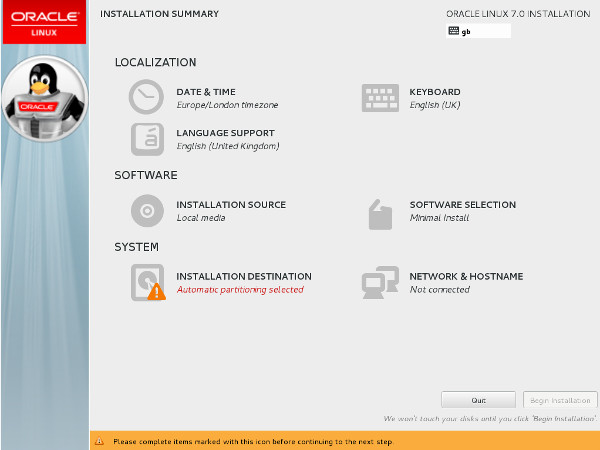
  3. You are presented with the "Installation Summary" screen. You must complete any marked items before you can continue with the installation. Depending on your requirements, you may also want to alter the default settings by clicking on the relevant links.
    Installation Summary
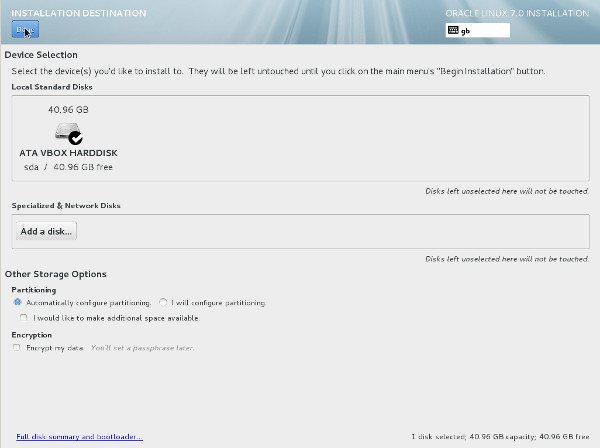
    Click the "Installation Destination" link.

  4. If you are happy to use automatic partitioning of the whole disk, click the "Done" button to return to the previous screen.
    Installation Destination
    If you want to modify the partitioning configuration, check the "I will configure partitioning" option, click the "Done" button and work through the partitioning screens.

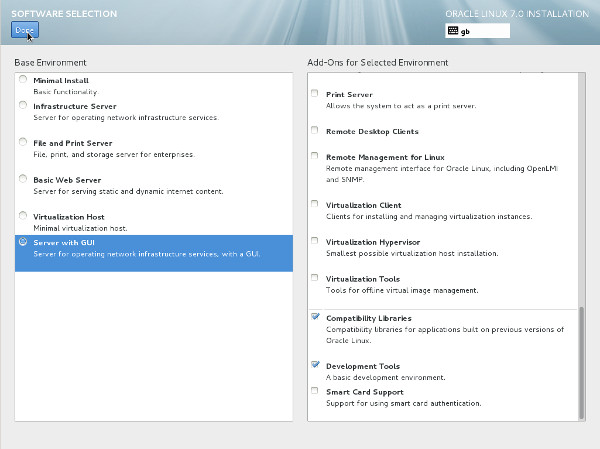
  5. It would be advisable to click on the "Software Selection" link and pick the following options if you want a GUI console.

    • Base Environment > Server with GUI

    • Add-Ons for Selected Environment > Compatibility Libraries

    • Add-Ons for Selected Environment > Development Tools

  6. Once you have completed your selections, click the "Done" button.
    Software Selection

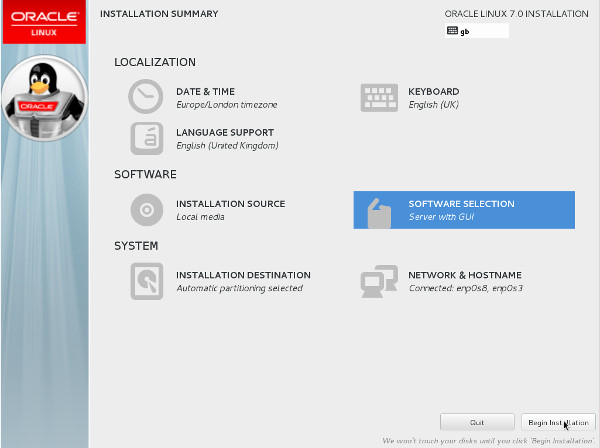
  7. Once you have completed your alterations to the default configuration, click the "Begin Installation" button.
    Installation Summary

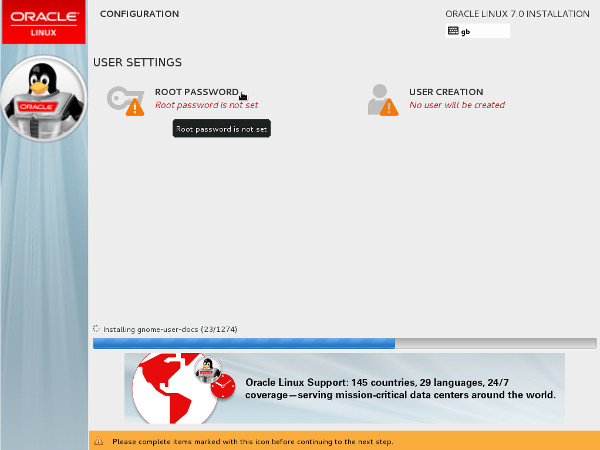
  8. Click the "Root Password" link.
    Configuration

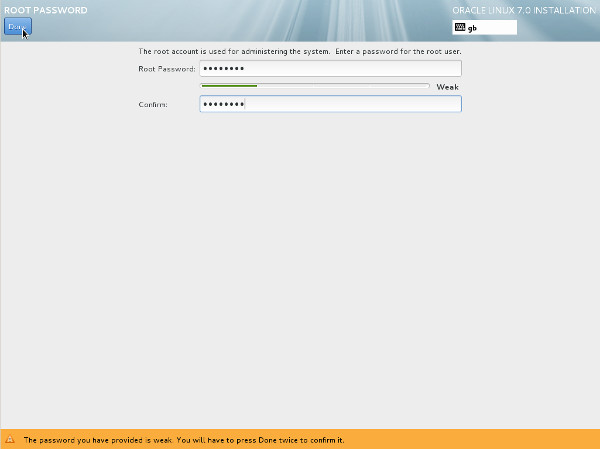
  9. Enter the root password and click the "Done" button.
    Root Password
    Click the "User Creation" link.

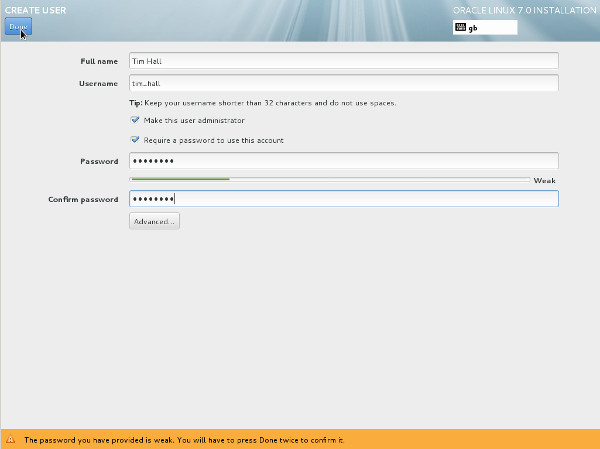
  10. Enter the user details and select the "Make this user administrator" option, then click the "Done" button.
    Create User

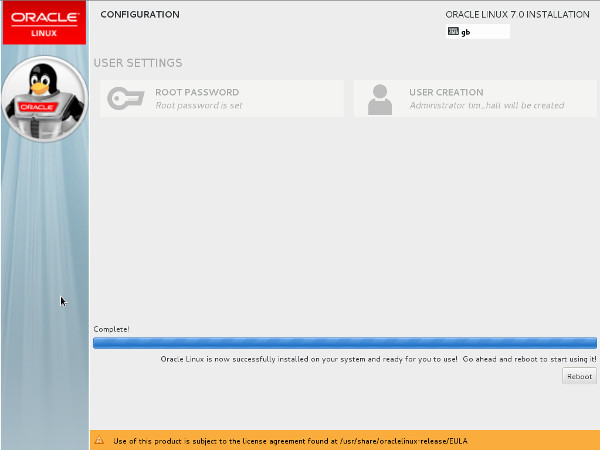
  11. Wait for the installation to complete. When prompted, click the "Reboot" button.
    Configuration

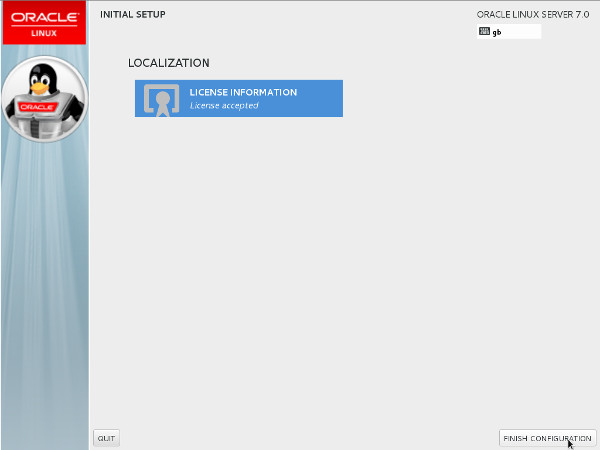
  12. Click the "License Information" link. Check the "I accept the license agreement" checkbox and click the "Done" button. When you return to the previous screen, click the "Finish Configuration" button.
    Initial Setup

  13. Decide if you want to use Kdump and click the "Forward" button.
    Kdump

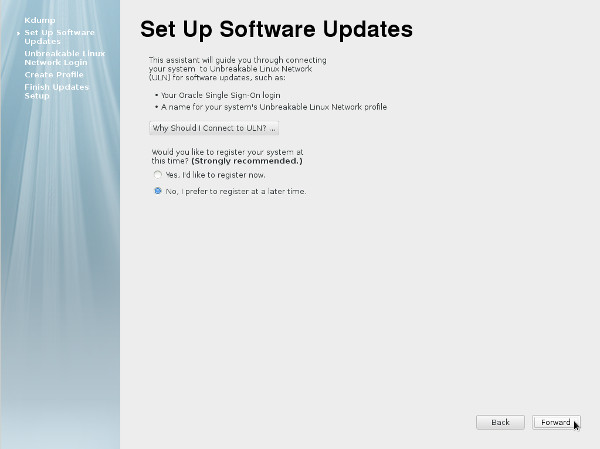
  14. Decide if you want to set up software updates and click the "Forward" button. If you chose not to register with ULN, you will need to confirm you decision also.
    Set Up Software Updates

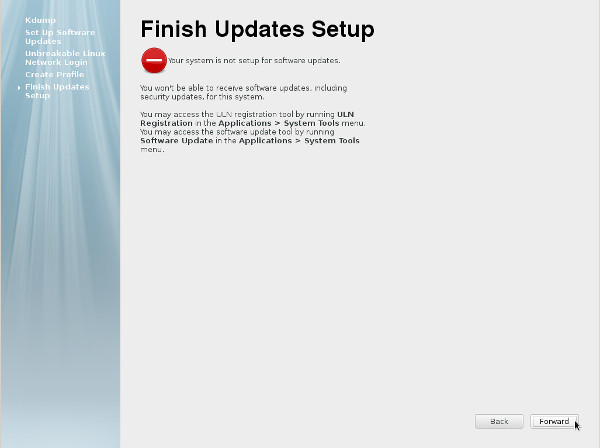
  15. Click the "Forward" button.
    Finish Updates Setup

  16. On the sign-in screen, click on the user you want to log in as.
    Enter the password and click the "Sign In" button.

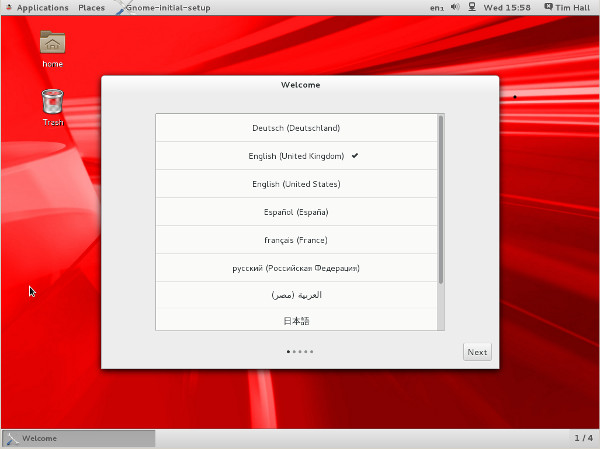
  17. Accept the language by clicking the "Next" button.
    Welcome

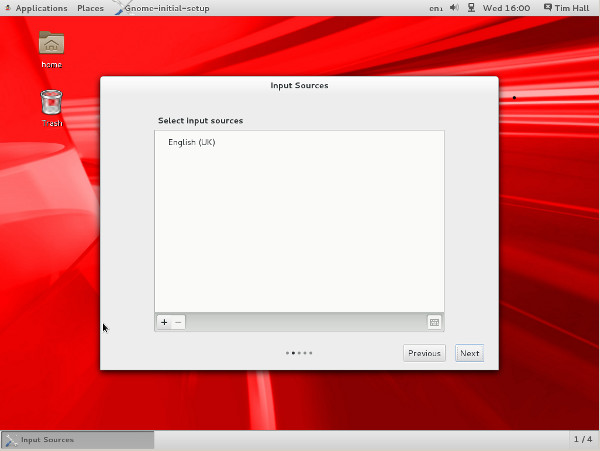
  18. Accept the input sources by clicking the "Next" button.
    Input Sources

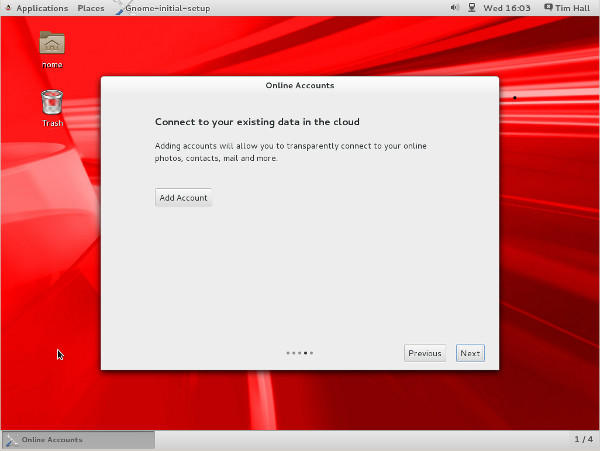
  19. Connect to existing data in the cloud, or just click the "Next" button.
    Online Accounts

  20. Click the "Start using Oracle Linux Server" button.
    Thank You

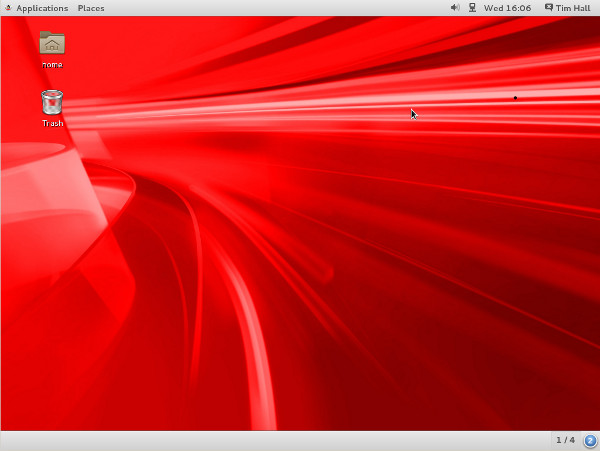
  21. You are now presented with the console screen.
    Console

Network Configuration

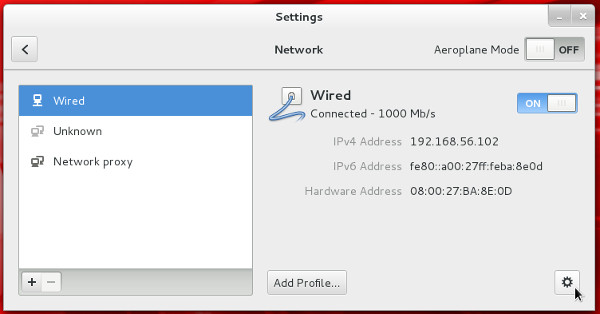
  • If you are using DHCP to configure your network settings, then ignore the following network configuration screens, otherwise click the network icon on the top bar and click the "Network Settings" link. You are then presented with the "Settings" screen. Highlight "Wired", flick the switch to "ON" and click the cog icon at the bottom-right.
    Network

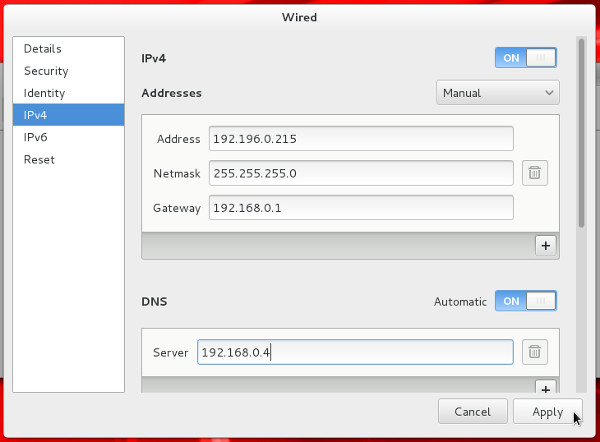
  • Click the IPv4 option, select the "Manual" method and enter the appropriate IP address and subnet mask, default gateway and primary DNS, then click the "Apply" button.
    Network Devices - IPv4

  • Close the "Network" dialogue.

Customising Software

  • You can customize the installed packages using the "Software" dialog (Applications > System Tools Software).
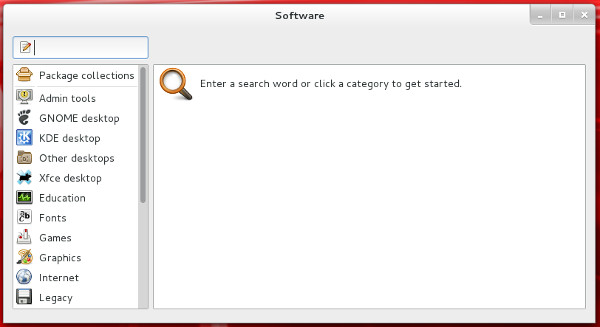
    Software

SELinux

  • If the OS is to be used for an Oracle installation, it is easier if Secure Linux (SELinux) is disabled or switched to permissive. To do this edit the "/etc/selinux/config" file, making sure the SELINUX flag is set as follows.
    SELINUX=permissive
    If SELinux is configured after installation, the server will need a reboot for the change to take effect.

Firewall

If the OS is to be used for an Oracle installation, you will need to disable or configure the local firewall  To disable it, do the following as the "root" user.
# systemctl stop firewalld

  • # systemctl disable firewalld

You can configure it later if you wish.

SSH

Make sure the SSH daemon is started using the following commands.
# systemctl start sshd.service

  • # systemctl enable sshd.service


Saturday, September 22, 2018

Webutil Configuration on Oracle 12c Forms and Reports Application.


                                                Webutil Configuration on Oracle 12c

1) We know the Webutil is very powerful utility provided by Oracle 
     by using Webutil we can achieve so many things which help you in creating a very user-friendly
application  

2) The best part of Webutil I think the interaction with the client system.

when people were using 6i application then so many things can be achieved and it was simple to interact with the client system because it was a 2-tier application but when we talk about 12c forms and reports application so many people are confused that how we will achieve our requirements.

But using Webutil we can achieve all the requirements.

Webutil contains an inbuilt object library(webutil.olb) and a  Pl/SQL library(webutil.pll)  and a package webutil_DB which we have to create on the database.

3)   some of the uses of webutil are below

  • Getting the information from the client system like IP address, username, system name, OS type and much more.
  • Used in the transfer the file from the server to the client and vice-versa.
  • Reading the image from the client system.
  • We can write the file directly on the client machine.
  • It can be used in forms for excel file (.xls, .xlsx, .csv) export and import through the forms.
And much more. I have used this on various programs like auto weight machine integration with the forms, for webcam integration,  signature pad integration, using mac address for security, barcode printing, excel generation through forms etc...


4) Now the webutil can be configured in two ways.
* Normal configuration or we can say webutil without ole2.
* Webutil with ole2.

if we have the requirement of ole2 then we will configure with ole2 else normal.
Ole2 invoke Microsoft application like excel word etc.... and write data on it using forms.
note:- In 12c we always prefer client_ole2 instead of ole2.

4-a)  webutil configuration without ole2 or Normal configuration.
steps to configure normal webutil

4-a1) To configure create the package WEBUTIL_DB.
this package is provided by the Oracle and you can find the package on forms directory of your oracle_home folder. create_webutil_db

The path for this pkg:-
E:\Oracle\Middleware\Oracle_Home\forms
In this folder, you will find the file named create_webutil_db.sql.
Open this file and copy the package and create the package in the database.

4-a2)  Change in webutil.cfg file.
         The path for webutil.cfg is
E:\Oracle\Middleware\Oracle_Home\user_projects\domains\base_domain\config\fmwconfig\components\FORMS\instances\forms1\server
in this folder you will see the file webutil.cfg
 

  • comment the below lines using # shown in the below image.


  • Then enter the drive name on which you want to perform webutil operations.
  • Set TRUE on transfer.database.enabled, transfer.appsrv.enabled, transfer.appsrv.accesscontrol. See the below image for this.


Step 5) Then compile the webutil.pll and copy the .plx file on your execute folder(where you have .fmx files)
  • The path for webutil.pll is E:\Oracle\Middleware\Oracle_Home\forms 
  • Then copy the webutil.plx in your execute folder(where you have .fmx files)

      
Then restart the wls_forms and use the powerful utility the webutil.

4-a2) Configuring the webutil with ole2.

Do all the changes above mentioned.
To configure the webutil with ole2 firstly uncomment the below lines in webutil.cfg file by removing # from these lines.
we have commented these lines for normal configuration but for this, we have to uncomment these lines.
                         

Then do below steps:-


docs

jacob-1.18-M2-x64.dll
jacob-1.18-M2-x86.dll
jacob.jar
LICENSE.TXT
README.txt

  • copy Jacob-1.18-M2-x64.dll in D:\Oracle\Middleware\Oracle_Home\forms\webutil\win64

  • copy jacob-1.18-M2-x86.dll in D:\Oracle\Middleware\Oracle_Home\forms\webutil\win32

  • Edit extensions.jnlp file, making the following change.
  • Path of extensions.Jnlp file is E:\Oracle\Middleware\Oracle_Home\forms\java
  • From this: <!-- <jar href="jacob.jar"/> -->
  • To this  : <jar href="jacob.jar"/>


  • Now we have to Sign the jar file
  • To sign the jar file we have to create the keysotre file.
  • To create keystore file open command prompt as administrator. 
  • Then go to the E:\Oracle\Middleware\Oracle_Home\oracle_common\jdk\bin
  • Use the below command to create the keystore file.

E:\Oracle\Middleware\Oracle_Home\oracle_common\jdk\bin>keytool.exe -genkey -alias myapp -keyalg RSA -keystore .keysotre_myapp     

  • Press Enter.
  • here .keystore_myapp is the name of our keystore file.
Then it will ask you for some parameter like.
Enter keystore password:
Re-enter new password:
What is your first and last name?
  [Unknown]:  ABCABC
What is the name of your organizational unit?
  [Unknown]:  it
What is the name of your organization?
  [Unknown]:  ABC
What is the name of your City or Locality?
  [Unknown]:  Kanpur city
What is the name of your State or Province?
  [Unknown]:  up
What is the two-letter country code for this unit?
  [Unknown]:  in
Is CN=ABCABC, OU=it, O=ABC, L=kanpur city, ST=up, C=in correct?
  [no]:  yes

Enter key password for <myapp>
        (RETURN if same as keystore password):
Re-enter new password:

Enter the password and after 
give all the parameters as above mentioned.

A keystore file named .keystore_myapp will be created on the below directory 
E:\Oracle\Middleware\Oracle_Home\oracle_common\jdk\bin>

Then we will sign the jacob.jar using jarsigner

To sign the jacob.jar use below command on command prompt as administrator. 

Location of jarsigner.exe is E:\Oracle\Middleware\Oracle_Home\oracle_common\jdk\bin>
In the bin folder, you will able to see jarsigner.exe

the syntax for sign jacob.jar
jarsigner -keystore .keystore_myapp -storepass mypassword $ORACLE_HOME/forms/java/anyjarfile.jar myapp

The command to sign jacob.jar
E:\Oracle\Middleware\Oracle_Home\oracle_common\jdk\bin>jarsigner.exe -keystore .
keysotre_myapp -storepass weblogic123 E:\Oracle\Middleware\Oracle_Home\forms\jav
a\jacob.jar myapp


It will show the below messages after running above command.

jar signed.

Warning:
The signer certificate will expire within six months.
No -tsa or -tsacert is provided and this jar is not timestamped. Without a times
tamp, users may not be able to validate this jar after the signer certificate's
expiration date (2018-12-06) or after any future revocation date.

After signing the jacob.jar  we have to change some lines on configuration files.

Add below bold lines in the default.env file in Class_path the location for default.env is

E:\Oracle\Middleware\Oracle_Home\user_projects\domains\base_domain\config\fmwconfig\servers\WLS_FORMS\applications\formsapp_12.2.1\config


CLASSPATH=E:\Oracle\Middleware\Oracle_Home\jlib\frmbipc.jar;E:\Oracle\Middleware\Oracle_Home\forms\j2ee\frmsrv.jar;E:\Oracle\Middleware\Oracle_Home\forms\provision\frmconfig.jar;E:\Oracle\Middleware\Oracle_Home\jlib\ldapjclnt11.jar;E:\Oracle\Middleware\Oracle_Home\jlib\debugger.jar;E:\Oracle\Middleware\Oracle_Home\oracle_common\jlib\ewt3.jar;E:\Oracle\Middleware\Oracle_Home\oracle_common\modules\oracle.bali.share\share.jar;E:\Oracle\Middleware\Oracle_Home\jlib\utj.jar;E:\Oracle\Middleware\Oracle_Home\jlib\zrclient.jar;E:\Oracle\Middleware\Oracle_Home\reports\jlib\rwrun.jar;E:\Oracle\Middleware\Oracle_Home\forms\java\frmwebutil.jar;E:\Oracle\Middleware\Oracle_Home\forms\java\frmall.jar;E:\Oracle\Middleware\Oracle_Home\forms\java\jacob.jar;E:\Oracle\Middleware\Oracle_Home\oracle_common\jdk\jre\lib\rt.jar;


Then Change in formsweb.cfg to use webutil with client_ole2 or ole2.
The location of formsweb.cfg is E:\Oracle\Middleware\Oracle_Home\user_projects\domains\base_domain\config\fmwconfig\servers\WLS_FORMS\applications\formsapp_12.2.1\config
In Oracle 12c Forms And Reports Application Configuration Steps, we have seen the named parameters we have used to configure the Application

Add- WebUtilArchive=frmwebutil.jar,jacob.jar in named configuration.


Now Restart the WLS_FORMS and run the application with ole2 functionality on forms.

AFTER DOING ALL THESE CHANGES WHEN YOU WILL RUN YOU APPLICATION IT MAY GIVE SOME ERROR OF JAVA SECURITY THE TO RESOLVE THIS ISSUE


Go on control Panel
click on java icon
click on security tab if the java console.
click on Edit site list.
Add the URL of your application on the client system.
Apply the changes.
And then run the application and enjoy the webutil with client_ole2 on your forms.


 queries :
Abhishekjha1991@hotmail.com
Abhishekjha225@gmail.com


Configure Rsync - Transferring and synchronizing files between two machines in same network

  Configure Rsync in Oracle_Enterprise_Linux6.8   Rsync is a utility for efficiently transferring and synchronizing files between a compute...